Ben’s Cookies-Inspired Double Chocolate Cookies
Desserts · Gifts from the Kitchen · Vegetarian · Nut-Free · Time: 1 hr 55 min · Servings: 14 large cookies · Difficulty: Easy
Whenever I travelled to London for work, I always had one special request for our company secretary: “If possible, could you book me a hotel near Covent Garden?” It wasn't for the shopping or the sightseeing. It was because I wanted to be within walking distance of Ben's Cookies.
Almost as soon as I checked into my hotel, I'd make my way straight to the shop for my two favourite flavours, Double Chocolate and Orange Milk Chocolate. Warm, buttery, packed with generous chunks of chocolate, and perfectly crisp around the edges with a soft, chewy centre, they quickly became a tradition I looked forward to on every business trip.
I was thrilled when Ben's Cookies eventually expanded into Asia and opened a store in Singapore. Having one so close meant I never really felt the need to recreate my favourite cookies at home. But when the Wisma Atria store closed, I realised just how much I missed them. That inspired me to head into my own kitchen and recreate the cookies that remind me of so many wonderful trips to London.
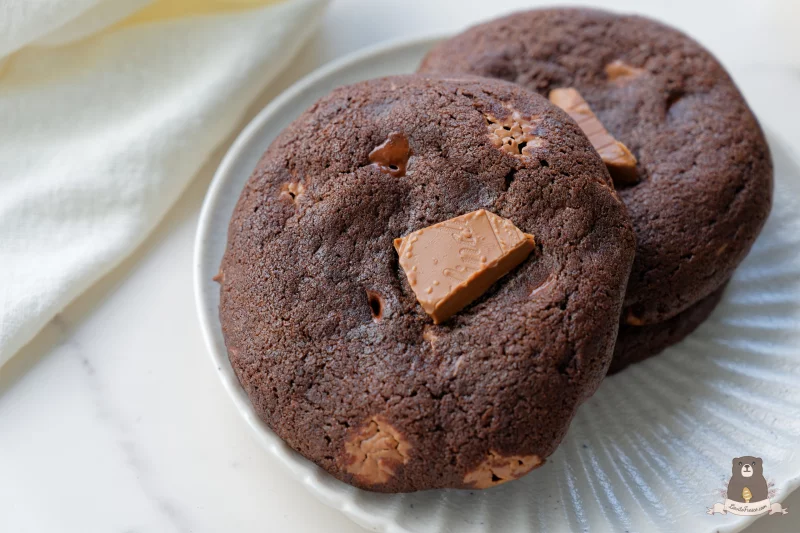
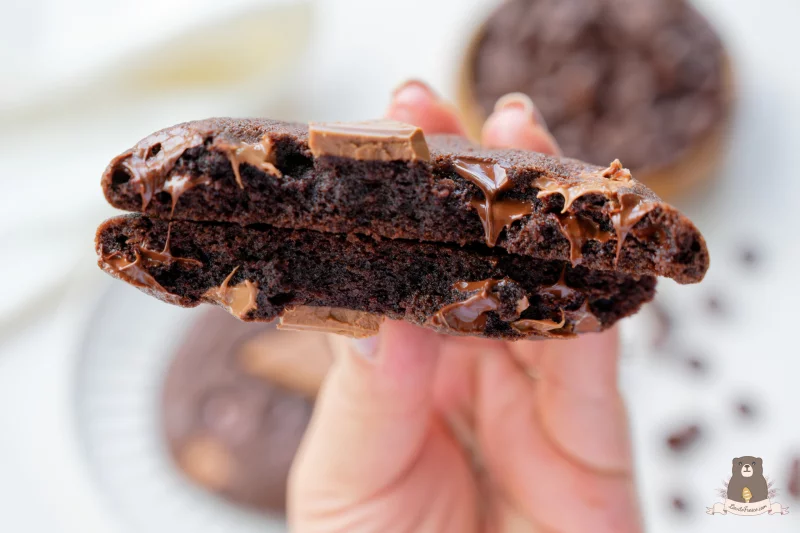
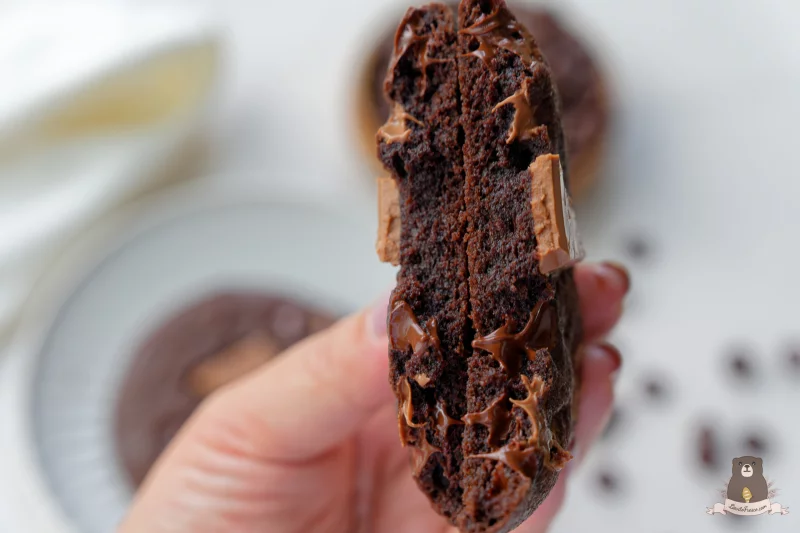
In true Lievito Fresco fashion, this recipe stays true to the texture I fell in love with while being a little less sweet than the original. The cookies are rich and buttery, with crisp, perfectly set edges, a thick, soft, chewy centre, and plenty of pockets of melted dark and milk chocolate in every bite. They are indulgent without being overly sweet, allowing the chocolate to really shine.
If you're a fan of the chocolate and orange combination, be sure to try my Ben’s Cookies-Inspired Orange & Milk Chocolate Cookies. The pairing of creamy milk chocolate and fragrant orange is hard to resist, and it's another recipe that always takes me back to those London cookie runs.
Why You'll Love These Double Chocolate Cookies
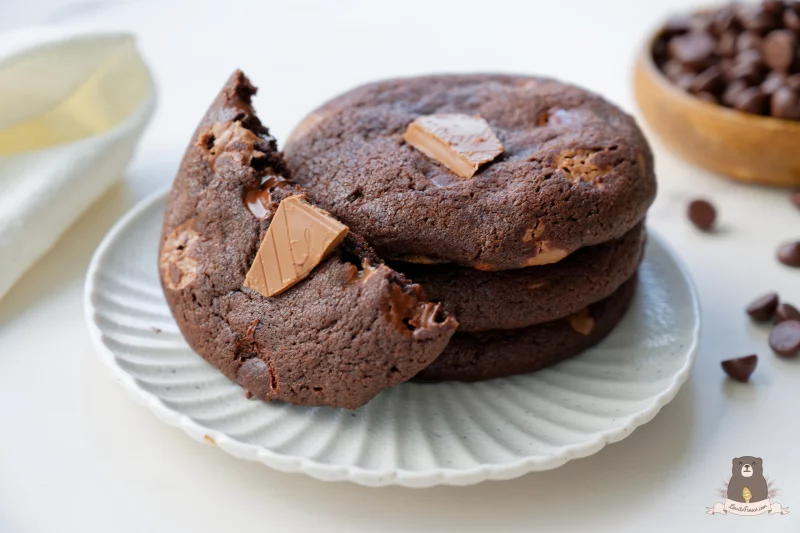
These Ben’s Cookies-inspired double chocolate cookies are made for chocolate lovers who love the contrast between crisp edges and a soft, chewy centre. The cocoa-rich dough is packed with dark and milk chocolate callets, creating plenty of melted chocolate pockets in every bite.
Chilling the dough helps the cookies hold their thick, bakery-style shape while developing a deeper chocolate flavour. They are rich and indulgent without being overly sweet, making them perfect for enjoying slightly warm from the oven or storing for later.
What Makes Ben's Cookies So Special?
If you've ever visited the UK, chances are you've come across Ben's Cookies. Since opening its first store in Oxford in 1983, the bakery has become famous for its oversized cookies, generous chunks of chocolate, buttery flavour, and signature texture. Each cookie is baked until the edges are perfectly set while the centre remains soft and chewy, making them almost impossible to resist.
This recipe is inspired by those unforgettable cookies that became a highlight of my work trips to London. While it isn't an exact copy, it captures everything I love about them with my own Lievito Fresco twist. The cookies are a little less sweet, allowing the rich cocoa and premium chocolate to shine while still delivering that thick, bakery-style texture.
Ingredients for Double Chocolate Cookies
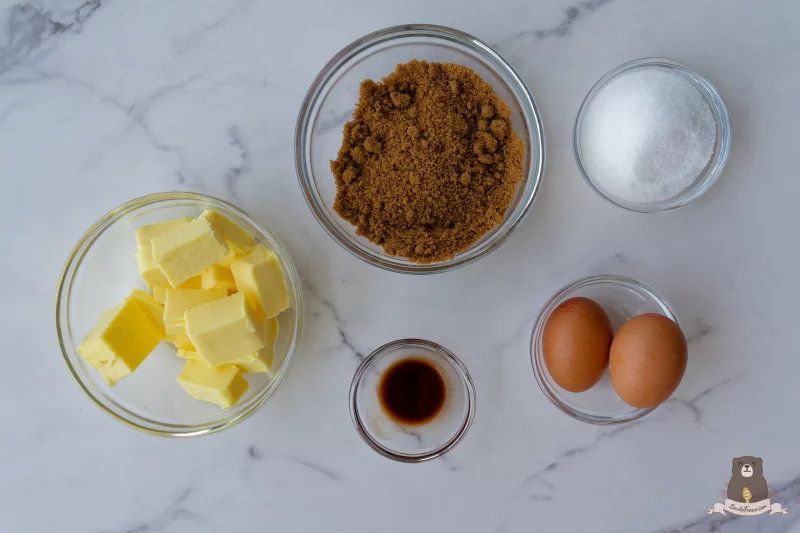
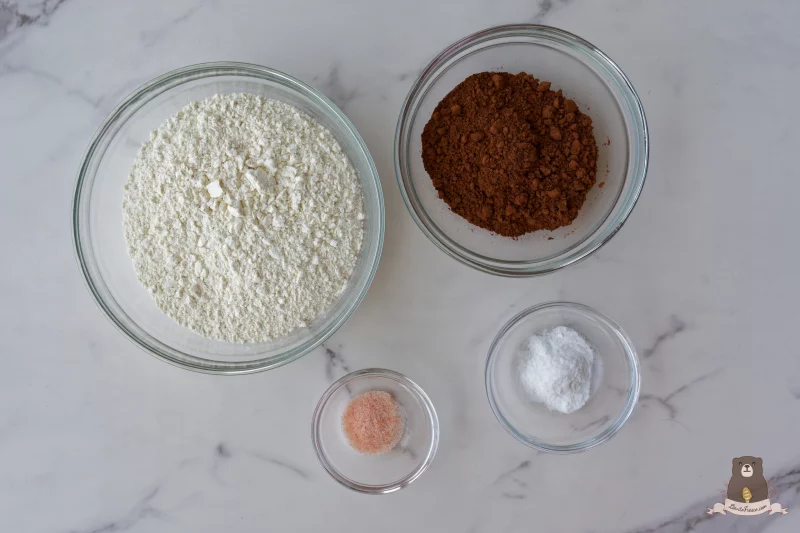
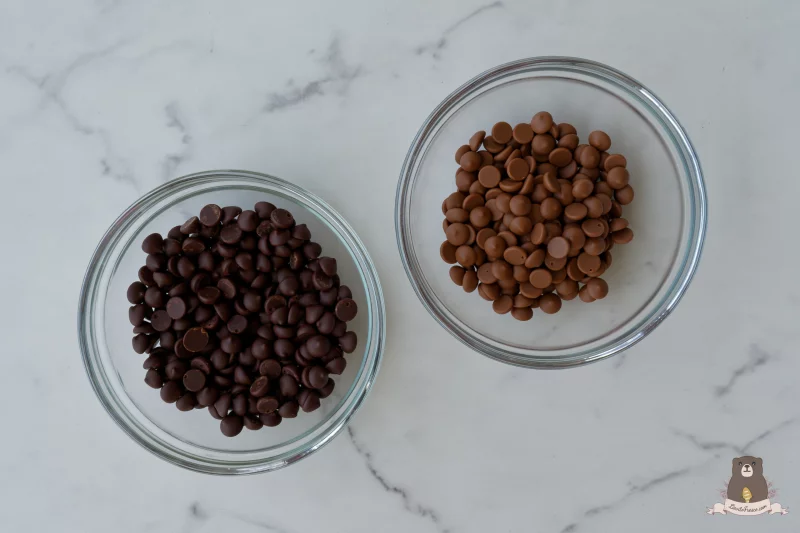
You only need a few simple ingredients to make these rich, bakery-style double chocolate cookies. Each ingredient plays an important role in creating their crisp edges, soft chewy centres, and generous pockets of melted chocolate.
- Unsalted Butter: Use softened butter at room temperature so it creams smoothly with the sugars and gives the cookies their rich, buttery flavour.
- Dark Brown Sugar: Dark brown sugar adds moisture and a subtle caramel flavour, helping create the soft, chewy texture these cookies are known for.
- Caster Sugar: Caster sugar helps balance the moisture from the brown sugar while contributing to the cookies' crisp edges and beautiful spread.
- Cocoa Powder: Unsweetened cocoa powder gives the cookies their deep chocolate flavour and rich colour without making them overly sweet.
- Dark & Milk Chocolate: I use a combination of Callebaut dark and milk chocolate callets for generous pockets of melted chocolate throughout each cookie. The combination gives you a lovely balance of rich dark chocolate and creamy milk chocolate. If you can't find callets, you can simply chop your favourite chocolate bars into large pieces.
Tips for Perfect Bakery-Style Double Chocolate Cookies
- Chill the dough for at least one hour before baking. If you have time, chilling it overnight develops an even richer flavour and improves the texture.
- Avoid overmixing once the flour has been added, as this can make the cookies tougher.
- Slightly flatten the cookie dough before baking to encourage an even spread.
- Bake just until the edges are set while the centres still look slightly soft. The cookies will continue cooking on the baking tray as they cool.
- For the best texture, enjoy them while they're still slightly warm, when the chocolate is perfectly melted.
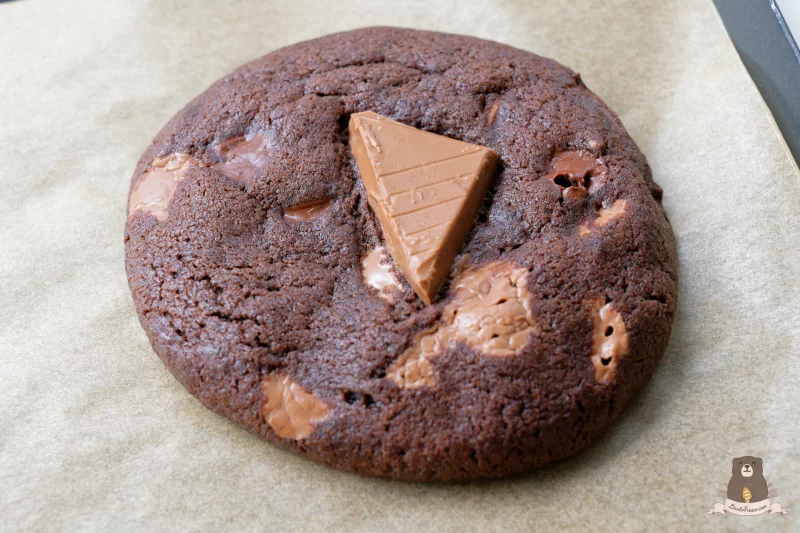
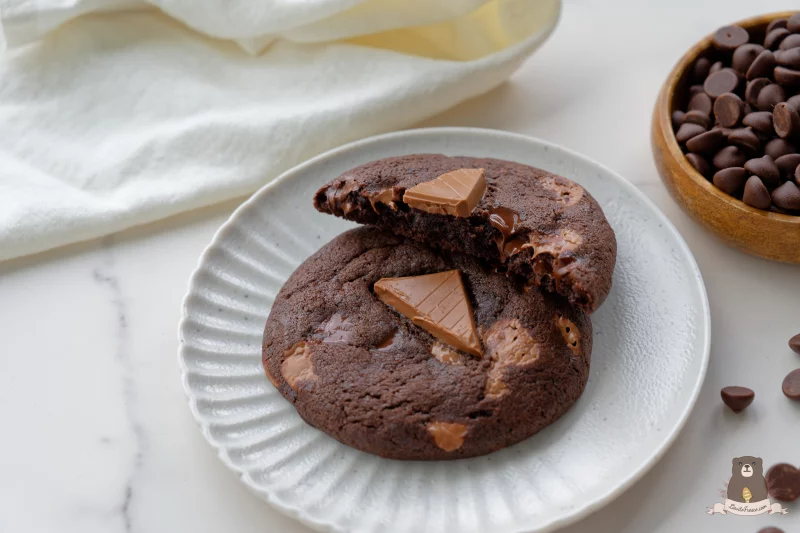
How to Get Crispy Edges and a Soft Chewy Centre
The secret to getting that classic bakery-style texture is knowing exactly when to take the cookies out of the oven. The edges should be set and lightly crisp, while the centres should still look slightly soft and underbaked. Don't worry if they seem a little too soft when they first come out of the oven. The residual heat from the baking tray will continue to cook the centres as they cool, leaving you with crispy edges and a soft, chewy centre.
Chilling the dough is also important. It helps control how much the cookies spread during baking while keeping them thick and giving the flavours more time to develop. I also recommend gently flattening each dough ball before baking. Because these are large, thick cookies, flattening them slightly helps them spread evenly and creates that beautiful bakery-style shape without making them too thin.
For the best soft and chewy double chocolate cookies, resist the temptation to bake them until they look completely done. The centres should still have a slight softness to them when you remove the tray from the oven. Once cooled, you'll have that lovely contrast between lightly crisp edges, a thick chewy centre, and pockets of melted chocolate throughout.
Storage
- Room Temperature: Store the cookies in an airtight container for up to 5 days.
- Freezer: The baked cookies can be frozen for up to 3 months. Simply thaw at room temperature or warm them in the microwave for 10 to 15 seconds before serving.
- Freezing the Cookie Dough: Portion the dough into 80 g balls, gently flatten each one, and place the chocolate triangles on top before freezing. Arrange the prepared cookies on a lined tray and freeze until firm. Once frozen, transfer them to a freezer-safe bag or container and store for up to 3 months. Bake directly from frozen, adding 2–3 minutes to the usual baking time.
- Bake a Few, Freeze the Rest: When I make these cookies, I usually bake just 4–6 cookies and freeze the remaining dough. That way, whenever we have a sweet craving, I can simply take a few cookie dough balls straight from the freezer and bake them fresh. It’s an easy way to have warm, bakery-style cookies whenever the craving strikes.
Frequently Asked Questions
- Can I use chocolate chips instead of chocolate callets?
Yes. Chocolate chips work perfectly well, although chopped chocolate or chocolate callets create larger pockets of melted chocolate and give the cookies a more bakery-style appearance. -
Why do I need to chill the dough?
Chilling helps prevent the cookies from spreading too much during baking while also developing a richer flavour and chewier texture. -
Why are my double chocolate cookies soft in the centre?
That's exactly what you want. The centres should still look slightly soft when you remove the cookies from the oven. They'll continue to cook and set from the residual heat of the baking tray, giving you crisp edges and a soft, chewy centre. -
Can I make the dough ahead of time?
Absolutely. The dough can be refrigerated for up to 48 hours before baking. In fact, many people find the cookies taste even better after an overnight chill. -
Can I use different types of chocolate?
Definitely. Although I love the combination of dark and milk chocolate, you can use all dark chocolate, all milk chocolate, or even add chopped hazelnut chocolate for a different twist.
Ingredients
Cookie Dough
- 200 g Softened Unsalted Butter
- 120 g Dark Brown Sugar
- 100g g Caster Sugar
- 2 large Eggs
- 5 g Vanilla Extract
- 300 g All Purpose Flour
- 45 g Unsweetened Cocoa Powder
- 4 g Baking Soda
- 3 g Fine Sea Salt
Chocolate
- 150 g Dark Chocolate Callets
- 100 g Milk Chocolate Callets
For Topping
- 30 g Milk or Dark Chocolate Bar (cut into small triangles for decoration)
Directions
- Cream the Butter and Sugar <p data-start="287" data-end="518" class="PDq2pG_selectionAnchorContainer">In a large mixing bowl, beat the softened butter, dark brown sugar, and caster sugar until smooth, creamy, and fully combined. Avoid overmixing or whipping too much air into the mixture, as this can make the cookies more cake-like. Add the eggs one at a time, mixing until each egg is fully incorporated before adding the next. Add the vanilla extract and mix briefly to combine.</p>
- Add the Dry Ingredients <p data-start="707" data-end="788" class="PDq2pG_selectionAnchorContainer">Sift the flour and cocoa powder into the bowl, then add the baking soda and salt. Mix on low speed or fold gently with a spatula until just combined and only a few streaks of flour remain. Be careful not to overmix, as this can make the cookies tougher.</p>
- Fold in the Chocolate Add the dark and milk chocolate callets and gently fold them through the dough until evenly distributed.
- Chill the Dough <p data-start="1135" data-end="1200" class="PDq2pG_selectionAnchorContainer">Cover the bowl and refrigerate the dough for <span data-start="1180" data-end="1199" style="">at least 1 hour</span>. For an even deeper chocolate flavour and chewier texture, you can chill the dough overnight.</p>
- Portion and Decorate <p data-start="35" data-end="73" class="PDq2pG_selectionAnchorContainer">Preheat the oven to <span data-start="55" data-end="72" style="">170°C (340°F)</span>.<span aria-hidden="true" class="PDq2pG_selectionAnchor"></span></p><p data-start="75" data-end="112">Line a baking tray with baking paper. Using a large ice cream scoop or kitchen scale, divide the dough into <span data-start="184" data-end="201">80g portions</span> and roll each portion into a ball. Place the dough balls well apart on the prepared baking tray. Gently flatten each dough ball slightly with your hand. <span data-start="100" data-end="229">This step is important as it helps the cookies spread evenly during baking and gives them their signature bakery-style shape.</span> Press a few pieces of the reserved <span data-start="265" data-end="347">milk or dark chocolate bar triangles onto the top of each cookie before baking</span> for a simple bakery-style finish.</p>
- Bake <p data-start="1785" data-end="1926" class="PDq2pG_selectionAnchorContainer">Bake on the <span data-start="1797" data-end="1830" style="">middle rack for 14–16 minutes</span>, or until the edges are set and lightly crisp while the centres still look slightly underbaked. This timing gives the cookies their signature crisp edges while keeping the centres soft, chewy, and slightly gooey. Avoid overbaking, as the cookies will continue to cook and set from the residual heat of the baking tray as they cool.</p>
- Cool <p data-start="231" data-end="327" class="PDq2pG_selectionAnchorContainer">Leave the cookies on the baking tray for <span data-start="272" data-end="286" style="">15 minutes</span> before transferring them to a wire rack. Serve slightly warm, when the chocolate is still beautifully melted, or allow the cookies to cool completely before storing them in an airtight container.</p> <p data-start="485" data-end="515"></p>