Belgian Chocolate Cake with Chocolate Ganache Frosting
Desserts · Hosting Menu · Vegetarian · Nut-Free · Time: 1 hr 30 min · Servings: 12 · Difficulty: Medium
Some of my fondest memories of travelling for work in Germany are the little adventures I managed to squeeze into my weekends. Whenever I had a free day, I'd hop on a train and set off to explore another corner of Europe. One winter, that journey took me to Brussels with two simple goals: enjoy dinner at the iconic Chez Léon and experience Belgium's world-famous chocolate culture for myself.
Ever since I was a child, chocolate has always been my greatest weakness, so stepping into the Royal Gallery of Saint Hubert felt like walking into a dream. The elegant glass-roofed arcade was lined with beautiful chocolatiers, each window filled with rows upon rows of glossy pralines, delicate truffles, and handcrafted chocolate creations that looked almost too beautiful to eat. The rich aroma of freshly made chocolate drifted through the galleries, making it impossible to resist wandering into shop after shop. I happily sampled far more pralines than I care to admit and warmed up with one too many cups of rich Belgian hot chocolate as snow quietly fell outside.
What surprised me most wasn't just how much chocolate there was, but how different it tasted. Every chocolatier had its own signature pralines, each with its own balance of sweetness, richness, and flavour, yet they all had one thing in common: exceptional chocolate at the heart of every creation. It reminded me that great desserts don't need endless ingredients or elaborate techniques. When you begin with good chocolate, you can let its flavour do the talking.
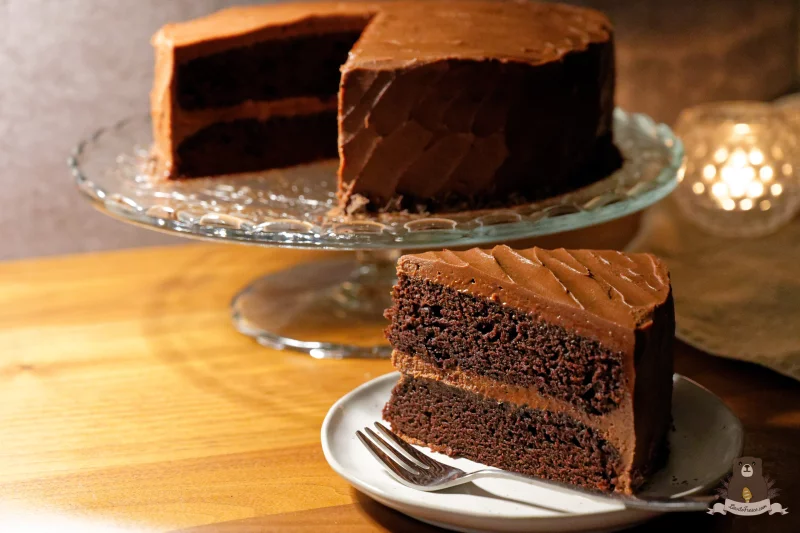
This Belgian chocolate cake is built on that simple idea. Deeply moist with an incredibly soft crumb and finished with a rich Belgian chocolate ganache frosting, it's a cake that celebrates the chocolate itself. It has become one of my favourite celebration cakes, one I've served at countless dinner parties and even baked as a birthday cake for my husband's family when they visited us from Switzerland. Without fail, everyone comes back for another slice.
If rich chocolate desserts are your weakness too, I think you'll love this recipe. And if you're in the mood for something lighter next time, my Apple Tarte Tatin recipe is another favourite, with buttery caramelised apples and crisp puff pastry creating an elegant French dessert that's surprisingly easy to make.
Creating a Simple Rustic Ganache Finish
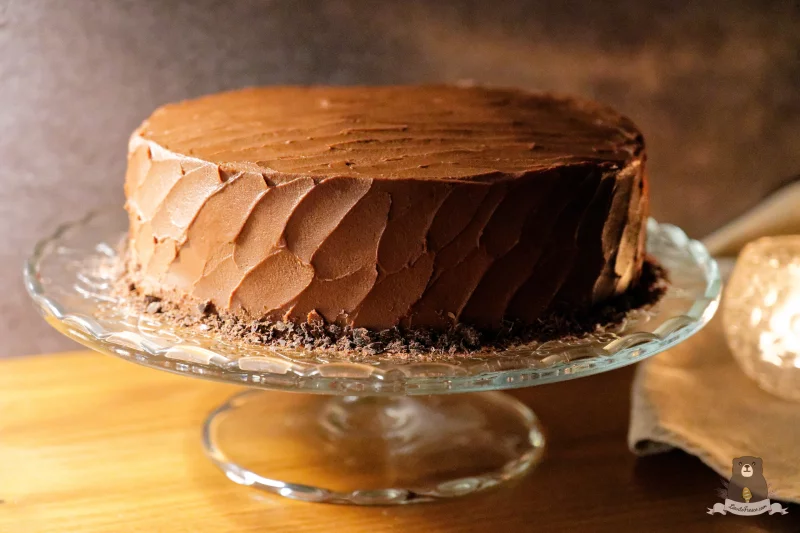
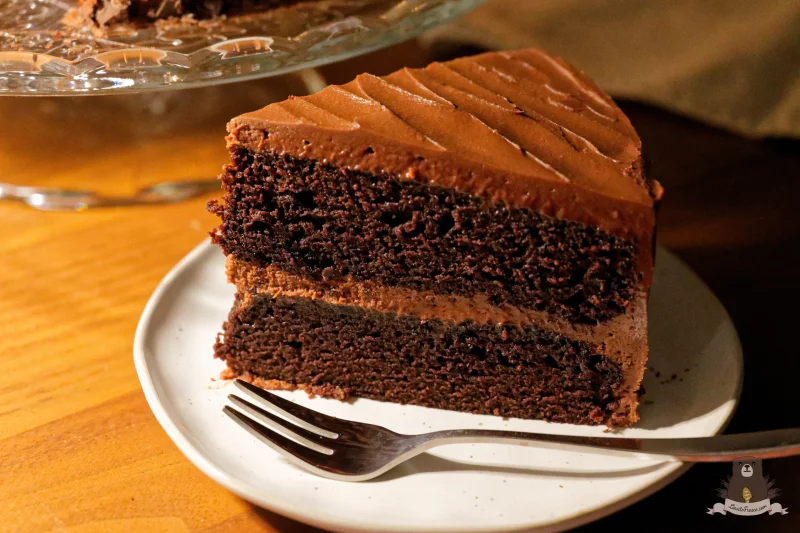
One of the things I love most about this cake is that it doesn't need elaborate decorations. A simple offset spatula is all you need to create a beautiful finish that lets the rich Belgian chocolate ganache take centre stage.
After applying a thin crumb coat and chilling the cake for 20–30 minutes, spread the remaining ganache evenly over the top and sides of the cake.
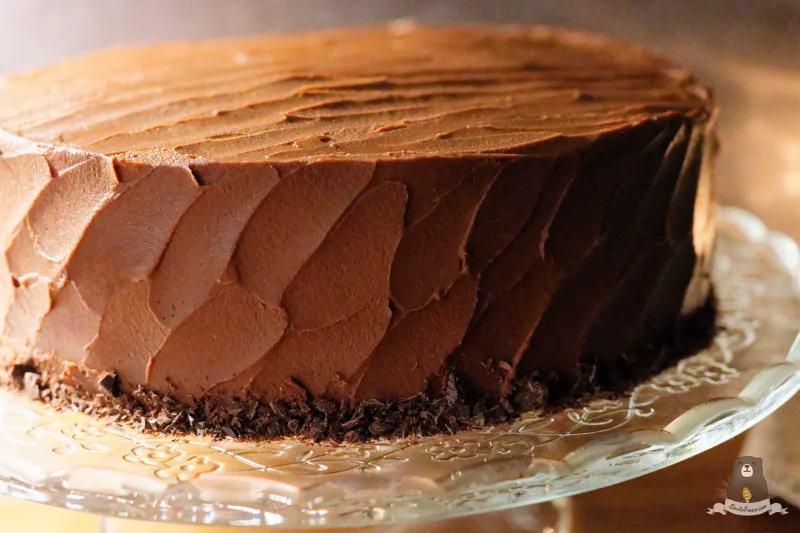
To create the textured sides, hold your offset spatula at a slight angle against the cake and begin near the bottom edge. Using short upward sweeping strokes, lift the spatula away after each stroke before moving slightly higher and repeating. Continue working your way around the cake, allowing each stroke to overlap the one below it. Rather than dragging the spatula continuously around the sides, these small individual strokes create the soft layered texture that gives the cake its rustic yet elegant appearance.
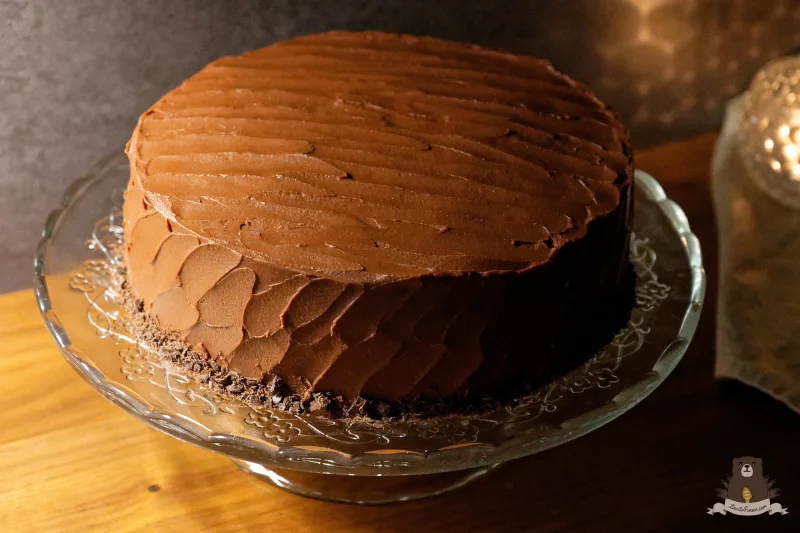
Once the sides are finished, spread a generous layer of ganache over the top. Using the offset spatula, gently sweep it from left to right, then back from right to left, lifting the spatula slightly at the end of each pass. Repeat until the surface is covered with soft overlapping lines that complement the pattern on the sides.
Don't worry about making every stroke perfectly even. The beauty of this finish lies in its simplicity. The subtle ridges catch the light beautifully, highlighting the silky texture of the ganache while giving the cake an elegant, handcrafted look that's easy enough for any home baker to achieve.
The Importance of Good Quality Chocolate
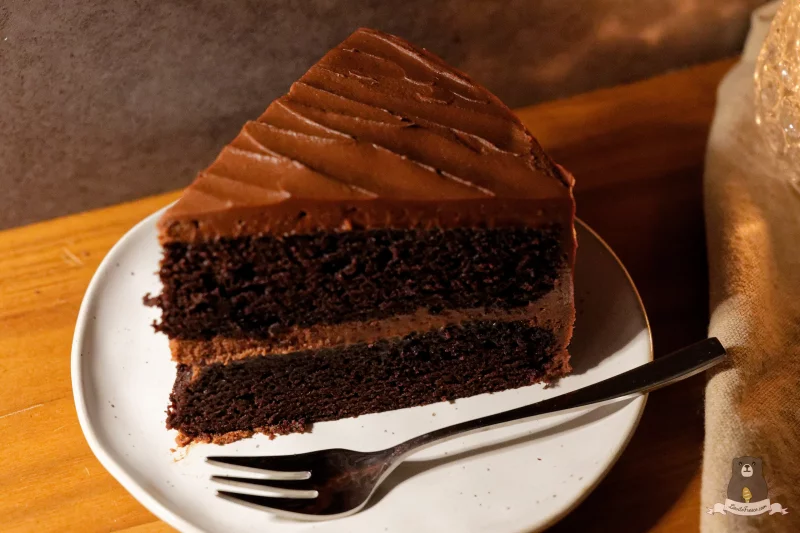
When it comes to chocolate cake, the chocolate you choose truly matters. During my weekend in Brussels, I quickly realised that great chocolate isn't simply sweet. It has depth, complexity, and a richness that lingers long after the last bite. That experience completely changed the way I bake with chocolate.
For this cake, I recommend using good-quality dark and milk chocolate that you genuinely enjoy eating on its own. I use a combination of 33% milk chocolate and dark chocolate with 50–55% cocoa, which creates a ganache that is rich, balanced, and not overly sweet. Since the frosting relies heavily on chocolate for both flavour and texture, using high-quality chocolate will give you a smoother, silkier finish and a more complex chocolate flavour.
Think of the chocolate as the heart of this recipe. Just as good butter elevates a pastry and ripe tomatoes transform a simple pasta sauce, good chocolate turns this cake from delicious into truly memorable.
Ingredients You'll Need
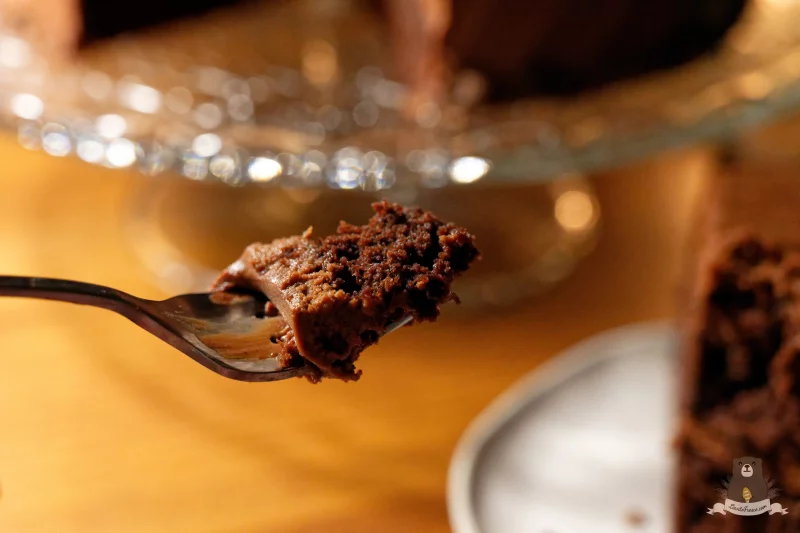
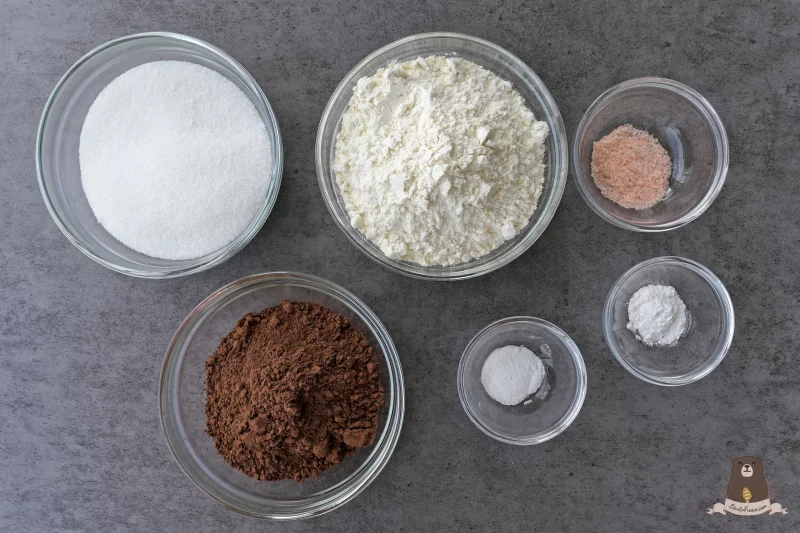
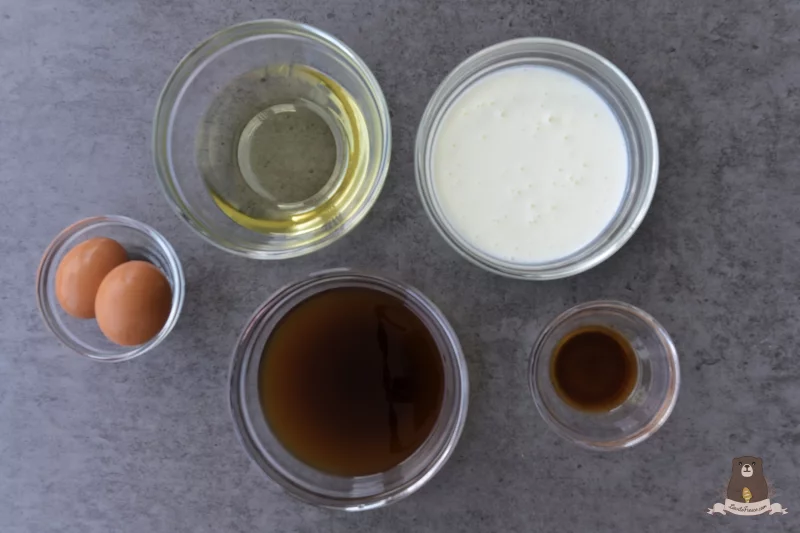
One of the things I love most about this cake is its texture. It has an incredibly soft, moist crumb that stays fresh for days without feeling heavy. While the rich chocolate flavour comes from a combination of Belgian chocolate and freshly brewed coffee, buttermilk is the secret ingredient that gives this cake its incredibly tender, moist crumb. Its gentle acidity reacts with the baking soda to create a softer texture while adding a subtle tang that balances the richness of the chocolate. Combined with vegetable oil and coffee, it creates a cake that stays moist for days without feeling dense.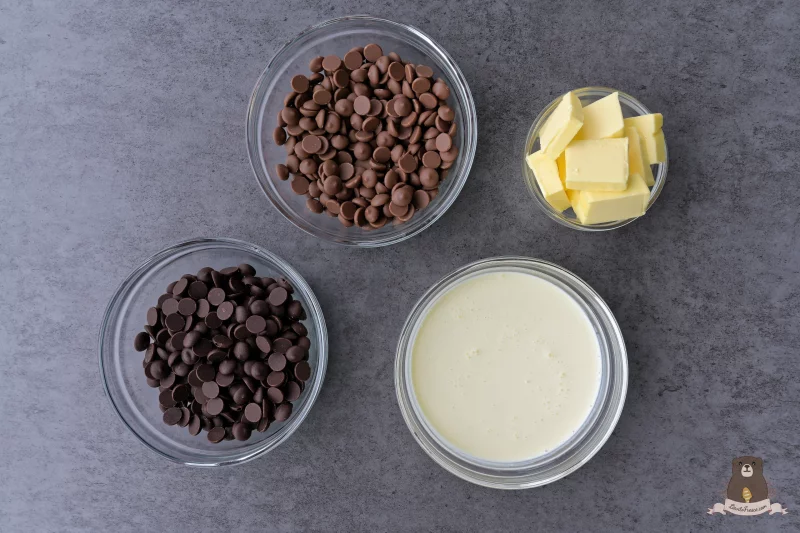
Don't Let Your Buttermilk Go to Waste
When to Use Simple Syrup
Simple syrup is an optional step that many pastry chefs use to add extra moisture and help cakes stay fresh for longer.
This Belgian Chocolate Cake is already incredibly moist, so you can confidently skip the syrup if you're serving it the same day. However, if you're baking the cake one or two days in advance, preparing it for a celebration, or simply love an extra-soft bakery-style crumb, a light brushing of simple syrup over each cake layer can make a subtle difference.
To make a simple syrup, combine 50 g caster sugar and 50 g filtered water in a small saucepan. Heat gently over medium-low heat, stirring until the sugar has completely dissolved. Bring the syrup to a gentle simmer and cook for 2 minutes, then remove it from the heat and allow it to cool completely. Lightly brush a thin layer over the cooled cake layers before spreading the Belgian chocolate ganache.
It helps the cake retain moisture as it rests, allowing the layers and ganache to meld together beautifully for an even more tender, luxurious slice. Since this cake is already naturally moist, use just enough syrup to lightly moisten the surface without soaking it.
Before You Begin
- Use room temperature ingredients. Let the eggs and buttermilk sit at room temperature for 20–30 minutes before baking. This helps the batter mix more evenly, creating a smoother batter and a softer, more tender crumb.
- Brush with simple syrup for extra moisture. Lightly brush the cake layers with simple syrup before frosting, especially if serving the cake the following day.
- Protect the cut cake. Once sliced, press a piece of parchment paper or plastic wrap directly against the exposed cut sides before covering the cake. This helps prevent the crumb from drying out.
- Chill before slicing. Refrigerate the assembled cake for 30–60 minutes before cutting and wipe the knife clean between each slice for neat, professional-looking slices.
- Choose good-quality chocolate. Since the ganache contains only a handful of ingredients, the flavour of the chocolate truly shines through.
- Use the right cream. Thickened cream and heavy whipping cream both work well for this ganache. If using chocolate bars instead of chocolate callets or baking wafers, chop them into small, even pieces before melting for a smooth, silky ganache.
- Don't be concerned by the batter. It will seem quite thin after adding the hot coffee, but this is completely normal and helps create the cake's incredibly moist, tender crumb.
Ingredients
Chocolate Cake
- 2 whole Eggs, room temperature
- 115 g Vegetable Oil
- 250 ml Buttermilk, room temperature
- 10 ml Vanilla Ectract
- 250 ml Freshly brewed hot coffee
- 300 g Caster Sugar
- 250 g All Purpose flour
- 85 g Unsweetened Cocoa Powder
- 7 g Baking Powder
- 7 g Baking Soda
- 5 g Fine salt
Silky Chocolate Ganache Frosting
- 200 g Milk Chocolate (33% cocoa)
- 200 g Dark Chocolate (50–55% cocoa)
- 110 g Salted Butter (cold)
- 250 ml Thickened Cream
Simple Syrup (Optional)
- 50 g Caster sugar
- 50 g Filtered Water
Directions
- Prepare the Ganache Frosting <p data-start="758" data-end="1038" class="PDq2pG_selectionAnchorContainer">Place the milk chocolate, dark chocolate, butter, and cream in a heatproof bowl set over a saucepan of gently simmering water, ensuring the base of the bowl does not touch the water. Stir continuously until the chocolate has completely melted and the mixture is smooth and glossy.<span aria-hidden="true" class="PDq2pG_selectionAnchor"></span></p><p data-start="1043" data-end="1461">Remove from the heat and stir gently for 30 seconds to release any air bubbles. Press a piece of cling film directly onto the surface of the ganache to prevent a skin from forming, then let it cool at room temperature for 20–30 minutes. Transfer to the refrigerator and chill for at least 4 hours or overnight, until thick and firm. The ganache should have the consistency of soft peanut butter or scoopable ice cream.</p><p data-start="317" data-end="597" class="PDq2pG_selectionAnchorContainer"> </p><p data-start="1466" data-end="1845">When ready to assemble the cake, remove the ganache from the refrigerator and let it sit at room temperature for 15–25 minutes if it feels very firm. Beat with a hand mixer on medium speed for 1–2 minutes, just until the ganache becomes lighter in colour, fluffy, and spreadable. Stop mixing as soon as it holds soft peaks, as overbeating can make it too firm or slightly grainy.</p>
- Prepare the Cake Batter <p data-start="157" data-end="284" class="PDq2pG_selectionAnchorContainer">Preheat the oven to <span data-start="177" data-end="194" style="">180°C (350°F)</span>. Grease two <span data-start="207" data-end="225" style="">20 cm (8-inch)</span> round cake pans and line the bottoms with parchment paper.<span aria-hidden="true" class="PDq2pG_selectionAnchor"></span></p><p data-start="289" data-end="504">In a large bowl, whisk together the eggs, oil, buttermilk, vanilla extract, and hot coffee until well combined. In a separate bowl, sift together the sugar, flour, cocoa powder, baking powder, baking soda, and salt.</p><p data-start="509" data-end="717">Add the dry ingredients to the wet ingredients in three additions, whisking gently after each addition just until no dry streaks remain. Scrape down the sides and bottom of the bowl as needed. Do not overmix.</p><p class="isSelectedEnd"> </p><p data-start="722" data-end="940">Divide the batter evenly between the prepared cake pans (about <span data-start="785" data-end="802" style="">635 g per pan</span> if using a kitchen scale) and smooth the tops. Tap each cake pan firmly on the countertop <span data-start="893" data-end="906" style="">2–3 times</span> to release any large air bubbles.</p>
- Bake <p class="isSelectedEnd">Bake for 20–23 minutes, or until a skewer inserted into the centre comes out clean or with a few moist crumbs attached. Begin checking at the 20-minute mark, as ovens vary.</p><p class="isSelectedEnd">If baking both cakes together, rotate the pans halfway through baking if your oven has hot spots.</p><p>Allow the cakes to cool in the pans for 10–15 minutes before carefully transferring them to a wire rack. Leave the parchment paper attached until the cakes have cooled completely to help support the delicate crumb.</p>
- Prepare the Simple Syrup (Optional) <p class="isSelectedEnd">Combine the sugar and water in a small saucepan over medium-low heat, stirring until the sugar has completely dissolved. Do not allow the syrup to boil.</p><p>Remove from the heat and allow the syrup to cool completely before using.</p>
- Assemble the Cake <p data-start="250" data-end="452" class="PDq2pG_selectionAnchorContainer">Once the cakes have cooled completely, carefully remove them from the pans and peel away the parchment paper from the bottoms. If needed, level the tops with a serrated knife to create even cake layers.<span aria-hidden="true" class="PDq2pG_selectionAnchor"></span></p><p data-start="457" data-end="597"><span data-start="457" data-end="470">Optional:</span> If using simple syrup, lightly brush <span data-start="508" data-end="535">10–15 g (2–3 teaspoons)</span> over the cut surface of each cake layer using a pastry brush.</p><p data-start="602" data-end="794">Spread <span data-start="609" data-end="622">180–200 g</span> of ganache evenly over the first cake layer. Carefully place the second cake layer on top. The weight of the cake is enough to settle it naturally, so avoid pressing down. Apply a thin crumb coat over the top and sides of the cake, then refrigerate for <span data-start="880" data-end="897">20–30 minutes</span>, or until firm.</p><p data-start="918" data-end="1069">Spread the remaining ganache evenly over the top and sides of the cake, smoothing it with an offset spatula or creating soft rustic swirls, as desired.</p><p class="isSelectedEnd"> </p><p data-start="1074" data-end="1314">For the cleanest slices and best flavour, refrigerate the assembled cake for <span data-start="1151" data-end="1168" style="">30–60 minutes</span>. Before serving, let it stand at room temperature for <span data-start="1223" data-end="1240" style="">30–45 minutes</span> so the ganache softens slightly and the chocolate flavour is at its best.</p>
- Storage <p class="isSelectedEnd">Store the cake covered in the refrigerator for up to <span data-start="131" data-end="141" data-is-only-node="" style="">5 days</span>. If you've brushed the cake layers with simple syrup, the cake will stay exceptionally moist and is often even more flavourful on the second day as the flavours continue to develop. For the best taste and texture, remove the cake from the refrigerator <span data-start="394" data-end="411" style="">30–45 minutes</span> before serving to allow the ganache to soften and the chocolate flavour to fully bloom.</p>