Crispy Fried Chicken
Main Dish · Weekend Challenge · Dairy-Free · Nut-Free · Egg-Free · Time: 45 min + brining · Servings: 10 · Difficulty: Easy
This Crispy Fried Chicken recipe has been sitting in my notebook for years, waiting for the right time to share. It reminds me of the many work trips I made to Manchester over nearly a decade, where my colleagues would always insist that I couldn't leave without stopping by a proper chicken shop after a night out. Fried chicken may not be traditional British cuisine, but if you've spent any time in Manchester, you'll know that chicken shops are woven into the city's late-night food culture.
Looking back, those visits still make me smile. There was nothing fancy about them, just a proper no-frills chicken shop, the smell of freshly fried chicken in the air, and good food shared with great company. It's one of those simple travel memories that has stayed with me over the years.
Many of those shops had open kitchens, so you could watch the cooks coat, dredge, and fry each piece right before your eyes. I've always been naturally curious, so one day I asked one of the fry masters what the mysterious white liquid was that they dipped the chicken into before coating it in the seasoned flour.
"It's just milk with a little vinegar," he replied.
I remember thinking, Really? That's it? It sounded almost too simple, but that little conversation stayed with me. Over the years, I experimented until I created a version using ingredients that most home cooks already have.
Instead of traditional buttermilk, I make a quick vegan buttermilk using unsweetened soy milk and fresh lemon juice because they're ingredients I usually keep in my kitchen. It helps the seasoned coating cling beautifully to the chicken, creating those irresistible craggy bits that fry up wonderfully crisp while helping lock in all the juiciness from the brine. If you don't have soy milk, don't worry, regular whole milk mixed with a little lemon juice works just as well. You can also use traditional buttermilk if that's what you already have in the fridge.
Now, I should probably mention that this recipe is a little different from what I usually gravitate towards. Most of the recipes you'll find here on Lievito Fresco are fresh, wholesome, and inspired by my travels, recreated for everyday home cooking. But every once in a while, you just crave something indulgent and nostalgic—something that's simply good for the soul.
(Alright... before you judge me, I know that sounds like an excuse! 😄)
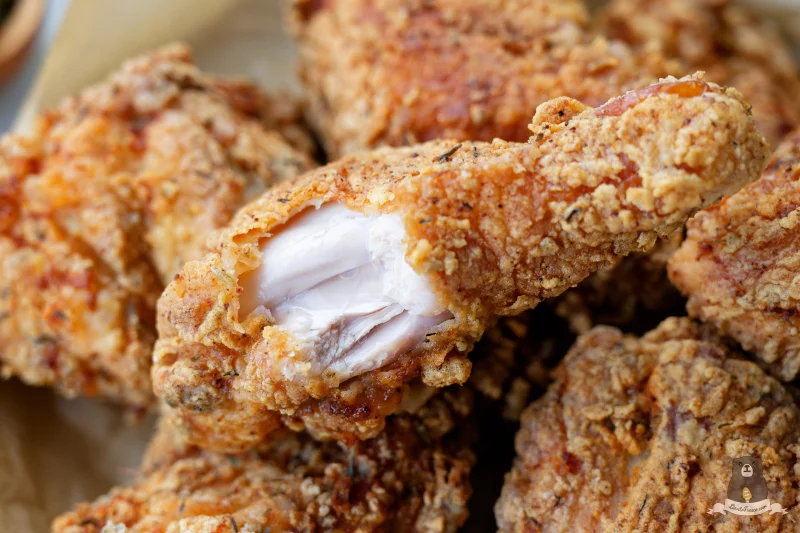
My husband isn't really a fan of fast food, which is completely understandable because he didn't grow up eating this kind of food. So I was especially curious to see what he'd think of this recipe. Happily, he approved, commenting on how flavourful the chicken was and, more importantly, how incredibly juicy it stayed inside. Coming from him, I considered that quite a compliment.
As for who will be happiest to see this recipe published, I already know the answer: my sister. She's been asking me to share this fried chicken recipe for quite a while, so this one's finally for you.
I hope this recipe brings a little comfort, plenty of crunch, and becomes one you'll reach for whenever you're craving something wonderfully indulgent.
A Carefully Balanced Spice Blend
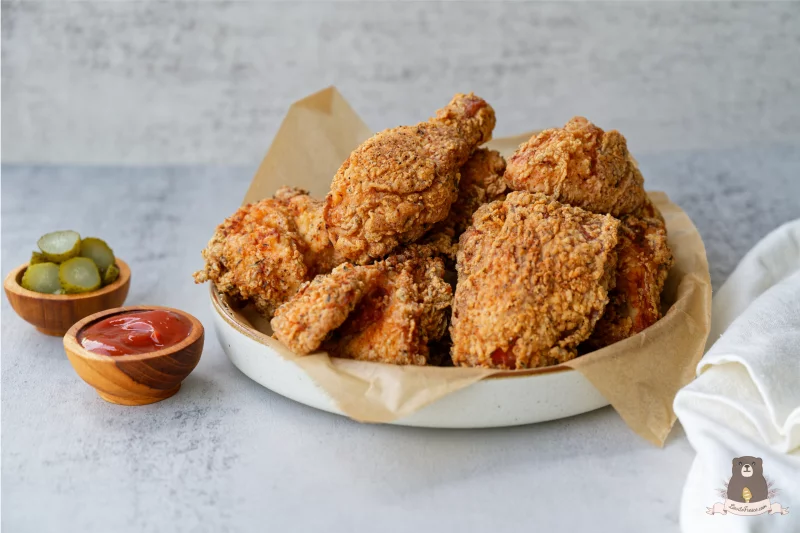
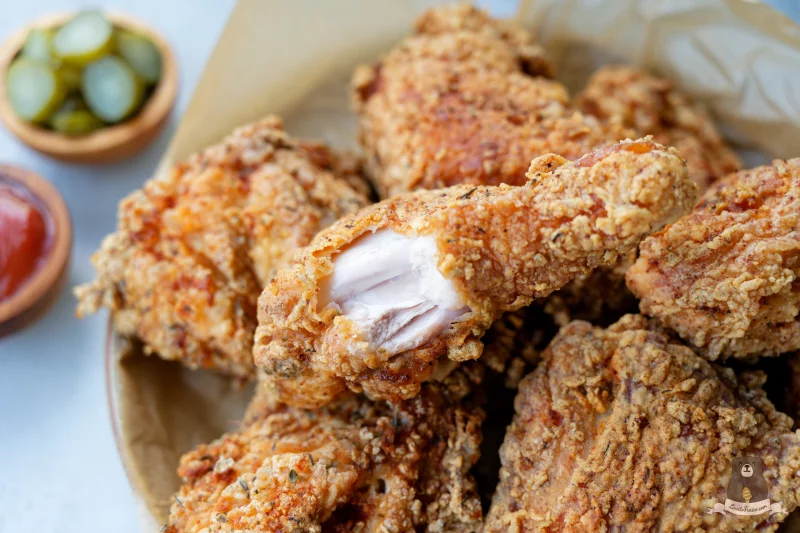
I spent quite a bit of time refining this seasoning blend because I wanted the coating to complement the chicken rather than overpower it. The combination of cornstarch and flour creates a coating that's light, crisp, and beautifully crunchy, while garlic powder and onion powder build a rich savoury base without becoming too intense. A touch of dried thyme adds a gentle herbaceous note that brings everything together, while freshly ground black pepper provides just enough warmth to keep each bite interesting. Paprika contributes a subtle hint of colour and sweetness rather than heat, and a small amount of sugar helps round out the savoury flavours while encouraging an even golden crust as the chicken fries. Finally, baking powder works quietly in the background, creating tiny air pockets that make the coating lighter and crispier.
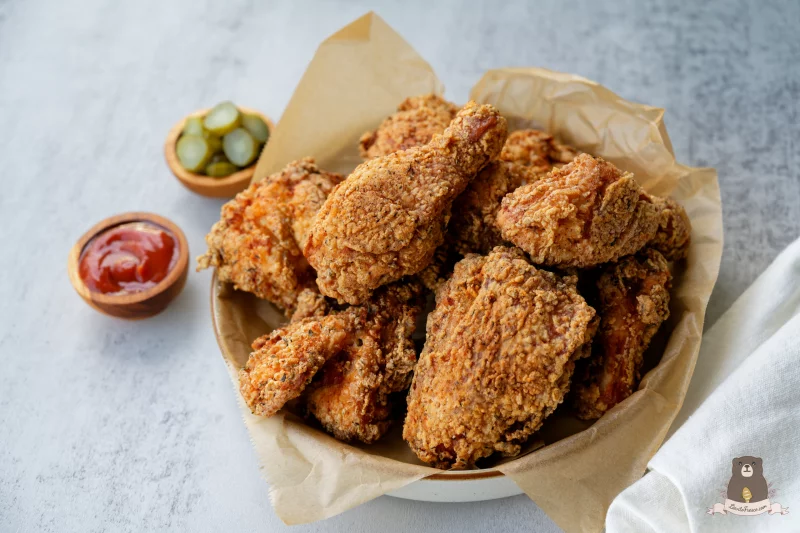
The result is a crisp, deeply savoury coating with delicate layers of flavour that never overpower the chicken. Every ingredient has a purpose, creating a beautifully balanced fried chicken that's just as delicious on its own as it is dipped into ketchup, honey mustard, ranch, or your favourite hot sauce.
Tips for the Crispiest Fried Chicken
Brine for the best flavour. While a 2-hour brine works well, letting the chicken brine overnight (8–12 hours) results in juicier, more flavourful meat.
Pat the chicken dry before coating. Removing excess moisture helps the batter cling evenly and creates a crispier crust.
Press the coating onto the chicken. After dredging, gently press the seasoned flour onto each piece to create those delicious craggy bits that become extra crispy when fried.
Use a steady medium heat. The oil should stay around 175°C (350°F), but you don't need to cook over high heat. A steady medium heat allows the chicken to cook through evenly while developing a beautifully crisp, golden crust without burning the coating.
No thermometer? Test the oil with a little batter. If you don't have a kitchen thermometer, heat the oil over medium heat for about 10–12 minutes (depending on your pot and stove). Drop a small spoonful of the batter or a pinch of the seasoned flour into the oil. It should sizzle immediately, float to the surface, and slowly turn golden in about 45–60 seconds. If it browns almost instantly, the oil is too hot. If it sinks or barely bubbles, give the oil another minute or two to heat.
Don't overcrowd the pan. Fry the chicken in batches to maintain the oil temperature. Overcrowding lowers the temperature and can result in greasy, less crispy chicken.
Check for doneness. If you have a kitchen thermometer, insert it into the thickest part of the chicken without touching the bone. Cook chicken breasts to 75°C (165°F), wings to 75–80°C (165–176°F), and thighs and drumsticks to 80–85°C (176–185°F). While 75°C (165°F) is the minimum safe temperature for all chicken, thighs and drumsticks are at their juiciest and most tender when cooked to 80–85°C (176–185°F), as the extra heat helps break down their connective tissue. Without a thermometer, the chicken should be deep golden brown and the juices should run clear when the thickest piece is pierced with a skewer or knife. If you're unsure, make a small cut near the bone—the meat should be opaque throughout with no pink remaining.
Drain on a wire rack, not paper towels. A wire rack allows excess oil to drip away while keeping the coating crisp.
Ingredients
Chicken & Brine
- 1.3 kg Bone-in Whole Chicken (or drumsticks, thighs, wings, or a mix)
- 18 g Caster Sugar
- 19 g Fine Salt
- 7 g Garlic Powder
- 1 g Paprika
- 1½–2 litres Cold Water
Dry Dredge
- 180 g Cornstarch
- 100 g All-Purpose Flour
- 4 g Dried Thyme
- 8 g Garlic Powder
- 4 g Ground Black Pepper
- 7 g Baking Powder
- 5 g Onion Powder
- 0.8 g Paprika
- 5 g Fine Salt
- 4 g Caster Sugar
Soy Buttermilk Batter
- 120 g Soy Buttermilk (Mix 120 g (½ cup) unsweetened soy milk with 1 tbsp lemon juice. Let stand for 5–10 minutes until slightly thickened. Whole milk with lemon juice or traditional buttermilk can be used instead)
- 70 g Prepared Dry Dredge
For Frying
- 1.5 litres Vegetable oil or Peanut Oil
Directions
- Brine the Chicken <p data-start="1375" data-end="1463" class="PDq2pG_selectionAnchorContainer">In a large bowl, dissolve the sugar, salt, garlic powder, and paprika in the cold water.<span aria-hidden="true" class="PDq2pG_selectionAnchor"></span></p><p data-start="1465" data-end="1522">Add the chicken, ensuring all pieces are fully submerged.</p><p data-start="194" data-end="282" class="PDq2pG_selectionAnchorContainer"> </p><p data-start="1524" data-end="1637">Cover and refrigerate for at least <span data-start="1559" data-end="1570" style="">2 hours</span>, or overnight (<span data-start="1586" data-end="1600" style="">8–12 hours</span>) for the best flavour and juiciness.</p>
- Prepare the Dry Dredge <p data-start="1674" data-end="1774" class="PDq2pG_selectionAnchorContainer">In a large shallow bowl, whisk together all of the <span data-start="1725" data-end="1739" style="">Dry Dredge</span> ingredients until evenly combined.<span aria-hidden="true" class="PDq2pG_selectionAnchor"></span></p><p data-start="494" data-end="594" class="PDq2pG_selectionAnchorContainer"> </p><p data-start="1776" data-end="1990">Remove <span data-start="1783" data-end="1805" style="">70 g (about ½ cup)</span> of the dry mixture and transfer it to a separate bowl. Reserve this portion for the soy buttermilk batter, leaving the remaining Dry Dredge in the shallow bowl for coating the chicken.</p>
- Make the Soy Buttermilk Batter <p data-start="2035" data-end="2150" class="PDq2pG_selectionAnchorContainer">Add the prepared soy buttermilk to the reserved <span data-start="2083" data-end="2105" style="">70 g (about ½ cup)</span> Dry Dredge and whisk until smooth and thick.<span aria-hidden="true" class="PDq2pG_selectionAnchor"></span></p><p data-start="856" data-end="971" class="PDq2pG_selectionAnchorContainer"> </p><p data-start="2152" data-end="2241">The batter should be thick enough to coat the back of a spoon while still flowing easily.</p>
- Heat the Oil <p class="isSelectedEnd">Pour enough vegetable or peanut oil into a large, heavy-bottomed pot or Dutch oven to reach a depth of about 5–7 cm (2–3 inches). Begin heating the oil over medium heat until it reaches 175°C (350°F). The oil should be heating while you coat the chicken.</p><p><strong>💡 Tip:</strong> If you don't have a kitchen thermometer, test the oil by sprinkling in a small pinch of the dry dredge. If it sinks briefly before bubbling steadily and rising to the surface, the oil is ready. If it browns almost immediately, the oil is too hot. If it sits at the bottom with little or no bubbling, the oil needs more time to heat.</p>
- Coat the Chicken <p class="isSelectedEnd">Remove the chicken from the brine and pat it thoroughly dry with paper towels.</p><p class="isSelectedEnd">Add the chicken to the Soy Buttermilk Batter and toss until every piece is evenly coated. Lift each piece out, allowing any excess batter to drip back into the bowl.</p><p class="isSelectedEnd">Transfer the chicken to the remaining Dry Dredge, coating each piece evenly and gently pressing the mixture onto all sides to help it adhere. Shake off any excess coating, then carefully place the chicken directly into the hot oil.</p><p><strong>💡 Tip:</strong> It's perfectly normal to have a small amount of dry dredge left over after coating the chicken. The exact amount will vary depending on the size of your chicken pieces, how much soy buttermilk clings to the surface, and how generously you coat each piece. A small amount remaining is preferable to running out before coating the final pieces.</p>
- Fry the Chicken <p data-start="72" data-end="333" class="PDq2pG_selectionAnchorContainer">Once the oil reaches <span data-start="93" data-end="110" style="">175°C (350°F)</span>, carefully lower the chicken into the oil, working in batches to avoid overcrowding the pan. Fry over medium heat for about <span data-start="235" data-end="257" style="">7 minutes per side</span>, turning halfway through, until the coating is deep golden brown and crisp.<span aria-hidden="true" class="PDq2pG_selectionAnchor"></span></p><p data-start="338" data-end="528">The chicken is cooked when the internal temperature reaches <span data-start="398" data-end="414">75°C (165°F)</span> for breasts, or <span data-start="431" data-end="454">80–85°C (176–185°F)</span> for thighs and drumsticks, which produces the juiciest, most tender meat.</p><p data-start="2841" data-end="3018" class="PDq2pG_selectionAnchorContainer"> </p><p data-start="533" data-end="715">Transfer the fried chicken to a wire rack and let it rest for <span data-start="595" data-end="610" style="">3–5 minutes</span> before serving. This allows the juices to redistribute while helping the coating stay wonderfully crisp.</p>