No-Knead Artisan Bread
Bread · Gifts from the Kitchen · Hosting Menu · Vegan · Dairy-Free · Nut-Free · Egg-Free · Time: 3 hr 30 min · Servings: 12 · Difficulty: Easy
I first developed this recipe after my very first trip to Amsterdam back in 2013, when I travelled there for our company's year end management meeting and Christmas party. While most of my colleagues were making the most of Amsterdam's famous nightlife, I had a very different itinerary in mind.
One of my favourite things to do, then and still now, is wake up before sunrise and wander through a new city while it is still quiet. I love discovering tiny neighbourhood bakeries, breathing in the smell of freshly baked bread, and watching a city slowly come to life before everyone else wakes up.
I will admit, though, that walking around Amsterdam at 6:30 in the morning during winter was quite an interesting experience. It did not take long to realise that while I was setting out for the day, many of the late night partygoers were only just heading home, including several of my colleagues, who were returning to the hotel after a full night of celebrating. Meanwhile, I was happily carrying a warm loaf of bread and a cup of coffee. What can I say? I have always been an old lady at heart, even when I was only 25.
Those peaceful mornings and the beautiful artisan loaves I discovered in Amsterdam stayed with me long after I returned home. They inspired me to create a bread recipe that captures that same rustic bakery feel but is simple enough for anyone to make.
This no knead artisan bread has become even more meaningful during my pregnancy. On the days when I crave fresh homemade bread but do not have the energy for sourdough, this recipe has been an absolute lifesaver. Between feeding a starter, performing stretch and folds, and waiting through long fermentation times, sourdough can sometimes feel like a workout. This loaf gives me the same comforting experience with only a fraction of the effort.
It has also become especially helpful because my husband is such a bread lover. We never buy bread from the supermarket, so having an easy homemade loaf that I can prepare with minimal effort means there is almost always fresh bread in the house for his morning toast, sandwiches, or a little scarpetta with dinner.
Whenever I bake a loaf, I let it cool completely before slicing and freezing it. It has become one of my favourite kitchen shortcuts. When we are ready to enjoy it, whether it is avocado and eggs on toast for breakfast, a simple panino for my husband's dinner, or just a slice with butter and jam, we simply pop it straight into the toaster or our panini maker. It comes out tasting almost as if it were freshly baked, with a beautifully crisp crust and a soft, fluffy crumb.
I will always have a soft spot for sourdough because of its wonderful flavour and nutritional benefits, but I cannot deny how often this loaf has become a staple in our home. It delivers a crusty golden exterior, a soft and airy crumb, and all the comfort of homemade bread without the extra work.
For the best results, I recommend using a good quality bread flour with around 12% protein. It gives the loaf excellent structure, a beautifully chewy crumb, and that rustic bakery style crust.
With just a handful of pantry staples, you can create a bakery quality artisan loaf that is perfect for beginners, busy weekdays, or slow weekends at home. It is one of those recipes that proves great bread does not have to be complicated.
If you enjoy easy no-knead breads, you might also love my Overnight No-Knead Focaccia recipe. It develops rich flavour with an overnight rise and bakes up with a crisp golden crust and a beautifully light, airy interior. Whether you're building a cheeseboard, serving it alongside dinner, or filling it with your favourite sandwich ingredients, it's an incredibly versatile bread.
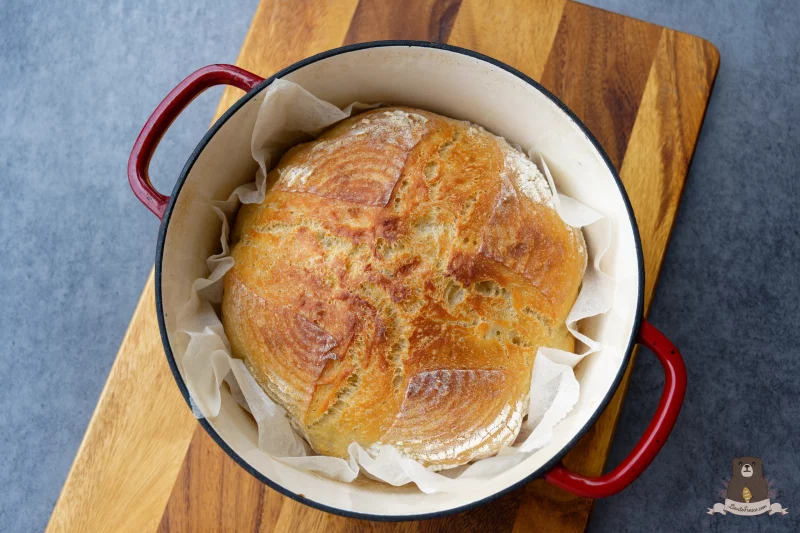
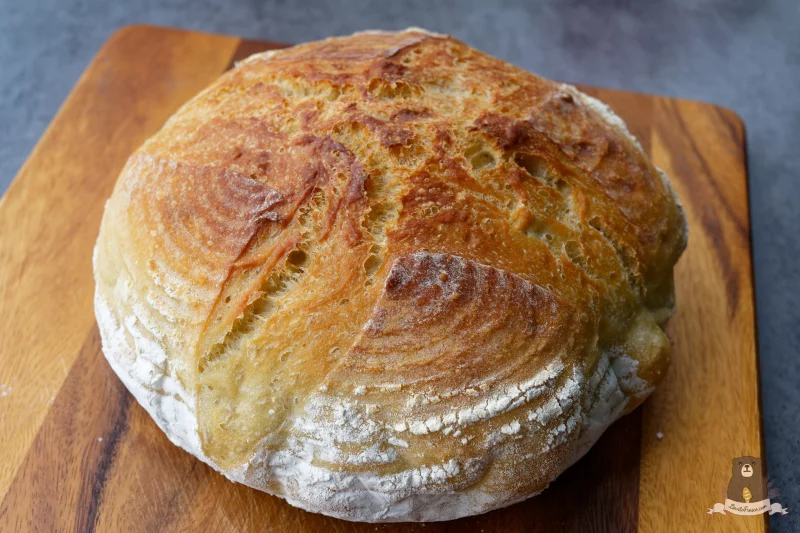
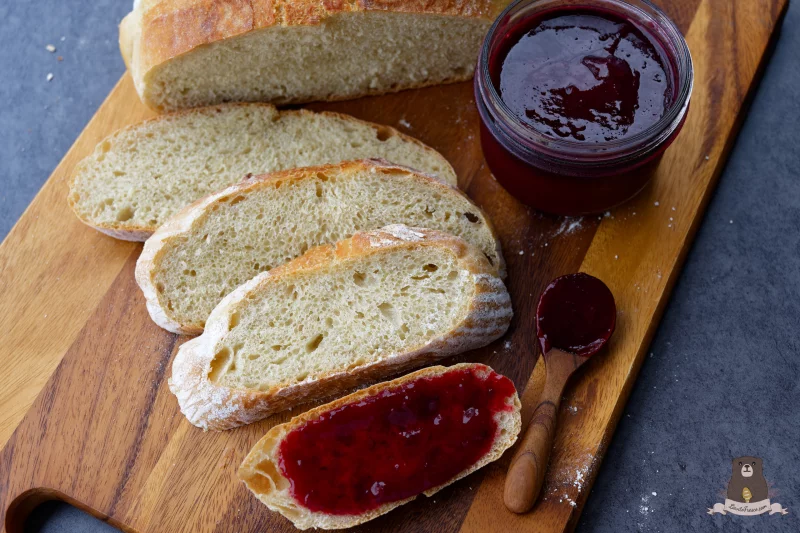
Why this Recipe works
This recipe works because it relies on time rather than effort. Instead of kneading to develop gluten, the dough is left to rest and ferment slowly, allowing the flour to naturally hydrate and build structure on its own.
The high hydration creates steam during baking, which helps form that signature crusty exterior while keeping the inside soft and airy. Meanwhile, the long resting time allows the yeast to gently develop flavour, giving you that bakery-style depth without any complicated technique.
It’s a simple method, but it follows the same principles as traditional artisan bread making—just made more accessible for everyday home baking.
What Is No-Knead Artisan Bread?
No-knead artisan bread is a simple homemade bread made using time and fermentation rather than traditional kneading. Instead of spending several minutes working the dough by hand or using a stand mixer, the ingredients are mixed together and left to rest while the gluten develops naturally.
The result is a rustic, bakery-style loaf with a crisp golden crust, a soft and airy interior, and plenty of homemade flavour.
This easy no-knead bread recipe is perfect for beginners because it requires only a few basic ingredients and very little hands-on work. Baking the dough in a hot Dutch oven also helps create steam, giving the bread that beautiful crusty exterior you would expect from an artisan bakery loaf.
How to Make No-Knead Artisan Bread
Making homemade artisan bread is much easier than it sounds. The dough comes together in just a few minutes, and there is no traditional kneading required. Most of the time is spent allowing the dough to rise and develop flavour.
Simply mix the dry ingredients, add the lukewarm water, and stir until a sticky dough forms. After the first rise, gently shape the dough, allow it to rest again, and bake it in a preheated Dutch oven until beautifully golden and crusty.
The Dutch oven traps steam during the first stage of baking, helping the bread expand and develop that signature artisan-style crust.
Tips for the Best Crusty No-Knead Bread
- Use bread flour for the best texture: Bread flour contains more protein than regular all-purpose flour, which helps develop stronger gluten and gives your homemade bread a chewier texture and better structure.
- Don't add too much flour when shaping: The dough should remain soft and slightly sticky. Adding too much extra flour while shaping can make the finished bread dense and dry.
- Preheat your Dutch oven: A properly preheated Dutch oven gives the dough an immediate burst of heat, helping the loaf rise and develop a crisp, golden crust.
- Let the bread cool completely: It can be tempting to slice into freshly baked bread straight away, but allowing the loaf to cool completely helps the inside finish setting. Cutting it too early can make the crumb appear gummy.
- Use steam for a crisp crust: The covered Dutch oven traps steam around the dough during the first stage of baking. This helps the loaf expand before the crust sets and contributes to that beautiful crusty exterior.
Can I Make This No-Knead Bread Without a Dutch Oven?
Yes, you can make this no-knead artisan bread without a Dutch oven, although the crust and oven spring may be slightly different.
You can bake the dough on a baking tray or pizza stone instead. To create steam, place an oven-safe tray on the lower rack and carefully add hot water once the bread goes into the oven.The steam helps keep the surface of the dough soft during the first stage of baking, allowing the loaf to expand before developing its crust.
A Dutch oven is still one of the easiest ways to achieve a crisp, bakery-style crust at home because it naturally traps steam around the bread.
How to Store and Freeze Homemade Artisan Bread
Allow the bread to cool completely before storing. Keep the loaf at room temperature in a bread bag, paper bag, or loosely wrapped in a clean kitchen towel.
For longer storage, slice the bread and freeze it in an airtight freezer bag or container for up to 3 months. This makes it easy to take out individual slices whenever you need them. You can toast frozen slices directly from the freezer or warm them in a toaster, oven, or panini press until heated through.
Avoid storing homemade crusty bread in the refrigerator, as this can cause the bread to stale more quickly.
Frequently Asked Questions
- Why is my no-knead bread dough so sticky?
No-knead bread dough is naturally wetter and stickier than many traditional bread doughs. The higher hydration helps create a soft, airy interior and contributes to a crisp crust. Avoid adding too much extra flour, as this can make the finished loaf dense. -
Can I use all-purpose flour instead of bread flour?
Yes, you can use strong all-purpose flour, especially one with around 12% protein. Bread flour will generally produce a chewier texture and give the dough more structure. -
How do I know when my bread has finished rising?
The dough should look noticeably larger and puffier after rising. For the first rise, it should be approximately doubled in size, although rising times can vary depending on the temperature of your kitchen. -
Why didn't my no-knead bread rise?
There are several possible reasons, including inactive yeast, water that was too hot or too cold, or a kitchen that is too cool. Make sure your yeast is fresh and use lukewarm water rather than hot water. -
Can I prepare the dough ahead of time?
Yes. No-knead bread is well suited to longer resting times, although you may need to adjust the amount of yeast and fermentation time depending on how long you plan to leave the dough. -
Why is my homemade bread dense?
Dense bread can happen if too much flour was added, the dough did not rise sufficiently, or the yeast was inactive. Make sure to measure the ingredients accurately and allow the dough enough time to rise. -
Do I need a banneton basket?
No. A banneton is helpful for supporting the dough and creating a traditional artisan bread shape, but it is not essential. You can use a deep bowl lined with a clean kitchen towel and generously dusted with flour. -
Why should I let the bread cool before slicing?
The bread continues to set as it cools. Slicing it too early can release steam and leave the inside of the loaf gummy or slightly wet. -
Can I freeze no-knead artisan bread?
Yes. Allow the bread to cool completely, slice it, and freeze it in an airtight container or freezer bag for up to 3 months. Individual slices can be toasted directly from frozen.
Ingredients
- 500 g Bread Flour (or strong all purpose flour (12% protein))
- 10 g Fine Salt
- 375 ml Lukewarm water ((~100°F / 38°C))
- 8 g Caster Sugar
- 3 g Active Dry Yeast (or 10g fresh yeast, crumbled)
Directions
- Mix the Dry Ingredients In a large bowl, whisk together the flour, yeast, salt, sugar until evenly combined.
- Add Water & Mix Pour in the lukewarm water and stir with a spoon until a rough, sticky dough forms. No kneading needed.
- First Rise (2 Hours) Cover the bowl with a towel or plastic wrap. Let the dough rise in a warm place for about 2 hours, or until doubled in size.
- Shape the Dough (3 Minutes) If using a banneton, lightly flour it ahead of time to prevent sticking. Lightly flour your work surface and gently transfer the dough. Fold the edges toward the center a few times, then shape it into a round ball. Tuck the bottom to create surface tension—this helps achieve that beautiful crust.
- Second Rise (30 Minutes) Transfer the shaped dough seam-side up into the prepared banneton. If you don’t have one, use a deep bowl lined with a kitchen towel and generously dusted with flour to prevent sticking. Cover and let it rest for another 30 minutes until slightly puffed.
- Preheat the Oven & Dutch Oven Place your Dutch oven (or oven-safe pot with lid) inside the oven and preheat to 230°C / 450°F.
- Bake the Bread Carefully place the dough into the hot Dutch oven. Add 4-6 ice cubes along the sides to create steam. Cover and bake for 30 minutes. Remove the lid, reduce the heat to 200°C / 400°F, and continue baking for another 15 minutes, or until the crust is a deep golden brown.
- Cool & Enjoy Allow the bread to cool completely before slicing. This ensures the crumb sets properly. Serve warm with butter, Homemade blackplum jam, or your favorite spread.